

Monsoon season in the desert southwest is my favorite time to get outside for landscape and nature photographs. Even though summer is winding down, there are still plenty of opportunities to photograph summer thunderstorms. For amateur and professional photographers alike there is some magic when it comes to capturing the perfect lightning strike. Photographing lightning can be both boring and thrilling, simple or difficult, and frustrating yet incredibly rewarding.
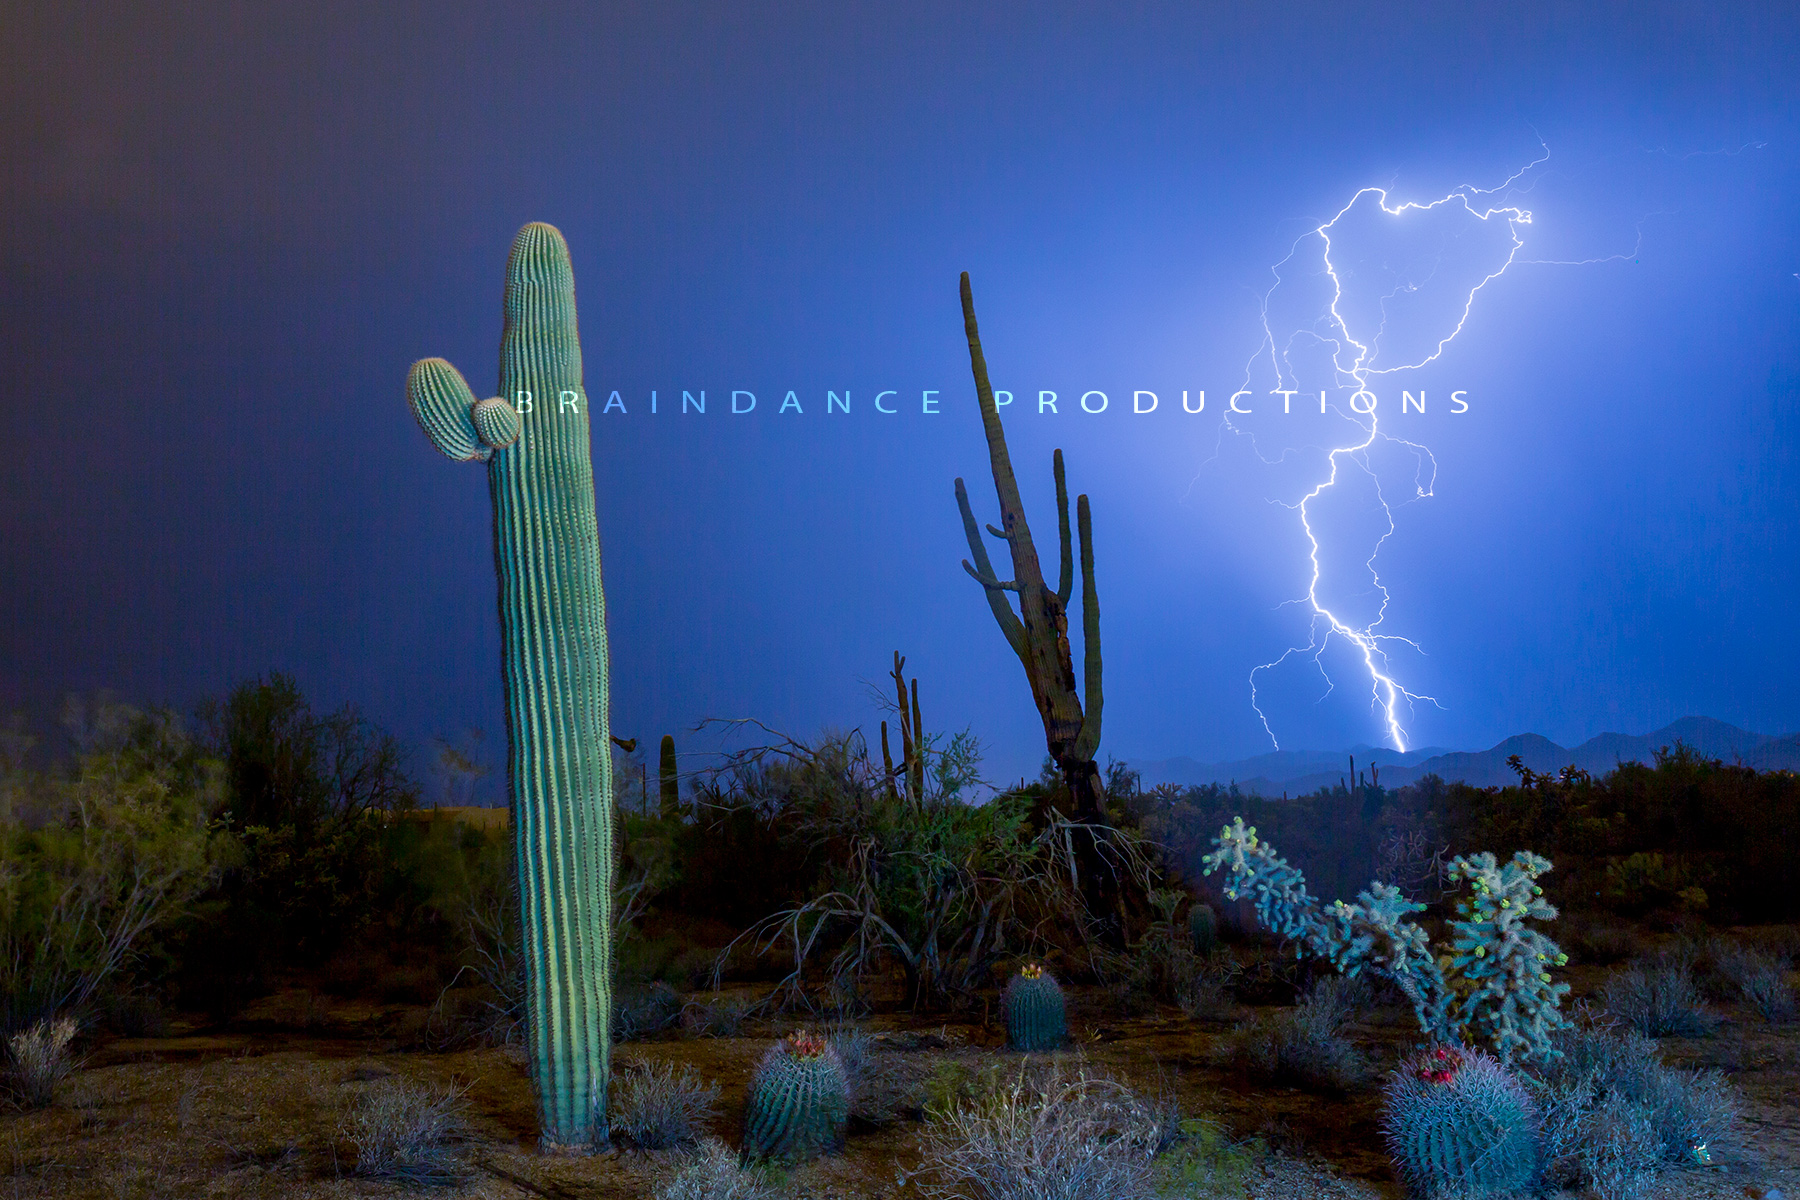
Capturing lightning at night is relatively easy with a little patience, the right equipment – and the right storm.
I get so many questions as to how to start out photographing lightning that I decided to share a few tips. Many people assume you need expensive equipment, extremely fast shutter speeds, and very quick reflexes to capture the moment of a strike. The tips I am going to share in this post will focus exclusively on shooting nighttime storms, and I will show why all of these assumptions are false. Before I begin let me emphasize the obvious. Lightning is obviously extremely dangerous – and anytime you hear thunder, lightning is close enough to strike you. In the southwest we are blessed to be able to see for long distances. It isn’t uncommon to see storms approach for 20 miles or more. While even that distance is still not completely ‘safe’, I definitely avoid situations where the storm is right on top of me (less than 5 miles), and I am rarely shooting storms while I am getting rained on. It is always a good idea to make sure you let someone know where you are and to check in with them frequently.
Tools needed:
- Any DSLR or camera allowing for manual settings
- A solid tripod (I use a carbon fiber because it is less conductive to electricity)
- A shutter release cable
- Smart phone with weather app
- Headlamp or small flashlight
To learn how to photograph lighting it is helpful to understand how cameras work. For the sake of visualizing let’s assume we are talking about an SLR or DSLR camera. In a typical scenario as the shutter opens light enters through the lens to expose an image to the sensor (or film). In very bright situations you may need to close the iris (f-stop), shorten the shutter speed, or lower the ISO so your shot is not overexposed. If you were to open the shutter in a completely black room then you will not expose the sensor and your image will remain black. Now if a flash is used in that black room the light from the flash will expose the sensor. Lightning works similar to a camera flash. It exposes the sensor for a fraction of a second. So, even if the shutter is left open the sensor will only be exposed for as long as there is light. In the case of lightning, changing the length of the shutter speed will have no affect on how bright the lightning is in your image.
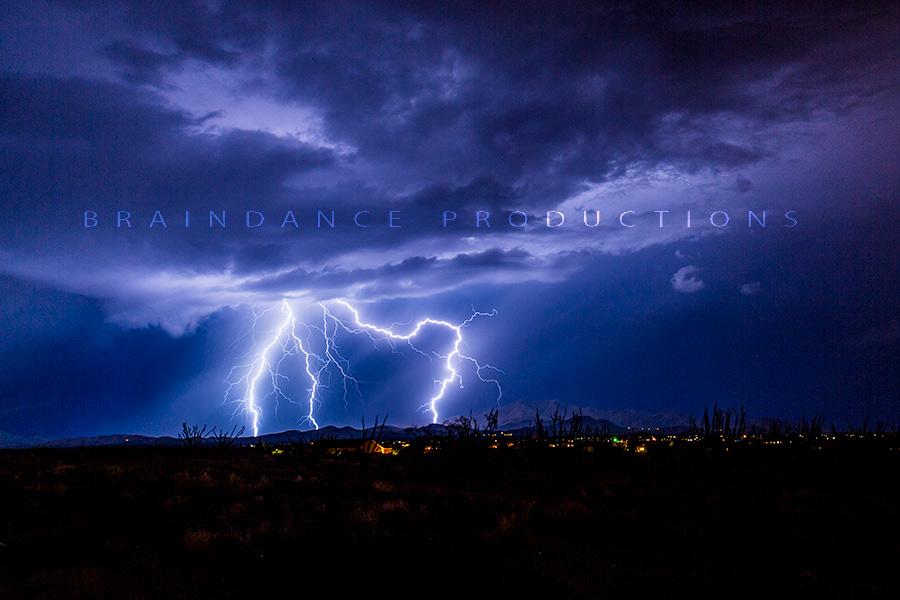
The lightning strikes in this image happened several seconds apart but were captured in a single photograph using a 20 second long exposure. This long exposure also helped to show the texture in the clouds themselves..
So, with that understanding we can learn how to photograph lightning at night. Even the darkest nights, however, are not pitch black. There is always a small amount of ambient light – from the moon, stars, nearby cities, streetlights, etc. In addition, lightning is often accompanied by strong winds. These factors combined with the fact that we will be using long shutter speeds require the use of a solid tripod. Once your camera has been mounted to a tripod you will need adjust the settings on your camera. I generally begin by turning my autofocus on – and I will focus on a distant light source. I will then turn the autofocus off. Without getting too technical – this is important because modern lenses can generally focus “beyond infinity”. Simply turning your focus to infinity could possibly result in images that are out of focus. Making camera adjustments in the dark is difficult – so the better you know your camera the better. In addition a small flashlight (even utilizing the flashlight on your smart phone) will save you a lot of headaches. Simply bumping the focus ring on your camera can ruin an entire evenings worth of photos. I always shoot in manual OR bulb mode when shooting lightning. This gives me the greatest amount of control. Manual mode requires planning all of your settings – including the length of your exposure (shutter speed), while ‘Bulb’ mode allows you to hold the shutter open (while holding the shutter button) and then close it when the shutter button is released. By using a remote shutter release you will not have to physically touch your camera. This means that you won’t move the camera over the course of the exposure. A good starting point for camera settings (assuming manual mode) is an ISO of 200, an F-Stop of 5.6 and a shutter speed of 20 seconds. You should also set your camera for continuous shooting. This is another advantage of using a shutter release cable – in that you can ‘lock’ the shutter to shoot continuously without even touching the camera. The benefit of the 20 second exposure is that any lightning strikes that appear within your field of view will be captured.

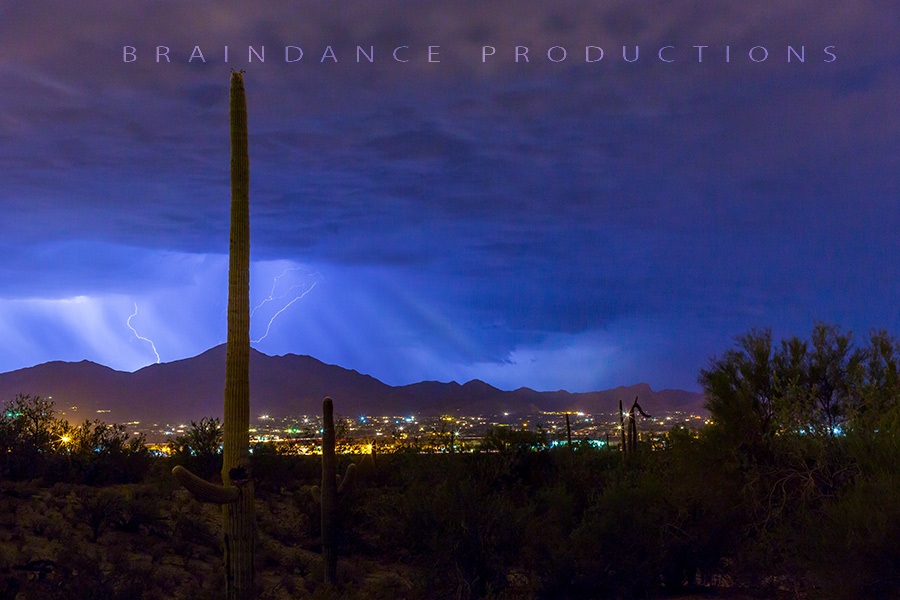
The ‘ghosting’ seen in the clouds is caused by the clouds moving during the 47 second exposure. Multiple ‘in-cloud’ lightning strikes exposed the movement at various intervals.
You may, however, decide you need more control of your exposure. When I am shooting with bulb mode I generally shoot ‘by feel’ with exposure ranging between 10 and 60 seconds. This allows me to try to capture single or multiple strikes within a single exposure. For the best quality images you should try to limit the length of your exposures. Longer exposures tend to increase ‘noise’ (digital grain) in your images. Hopefully these simple tips can help to unlock the mystery to capturing one of the most powerful displays that nature can provide. If you enjoyed this article, and/or have any questions feel free to leave any comments below. If you are interested in purchasing any of my nature photos or would like to schedule a portrait session – use the ‘Contact’ link in the menu above.
Leave a reply